| Problem 1 |
| Install Microsoft Visual Studio Community. Instale Microsoft Visual Studio Community. |
| Step A |
| Download Microsoft Visual Studio from https://www.visualstudio.com Descarge Microsoft Visual Studio desde https://www.visualstudio.comFIIGURE download |
| Step B |
| Save and Run the installation program Guarde y Ejecute el programa de instalación |
| Step C |
Select
|
| Problem 2 |
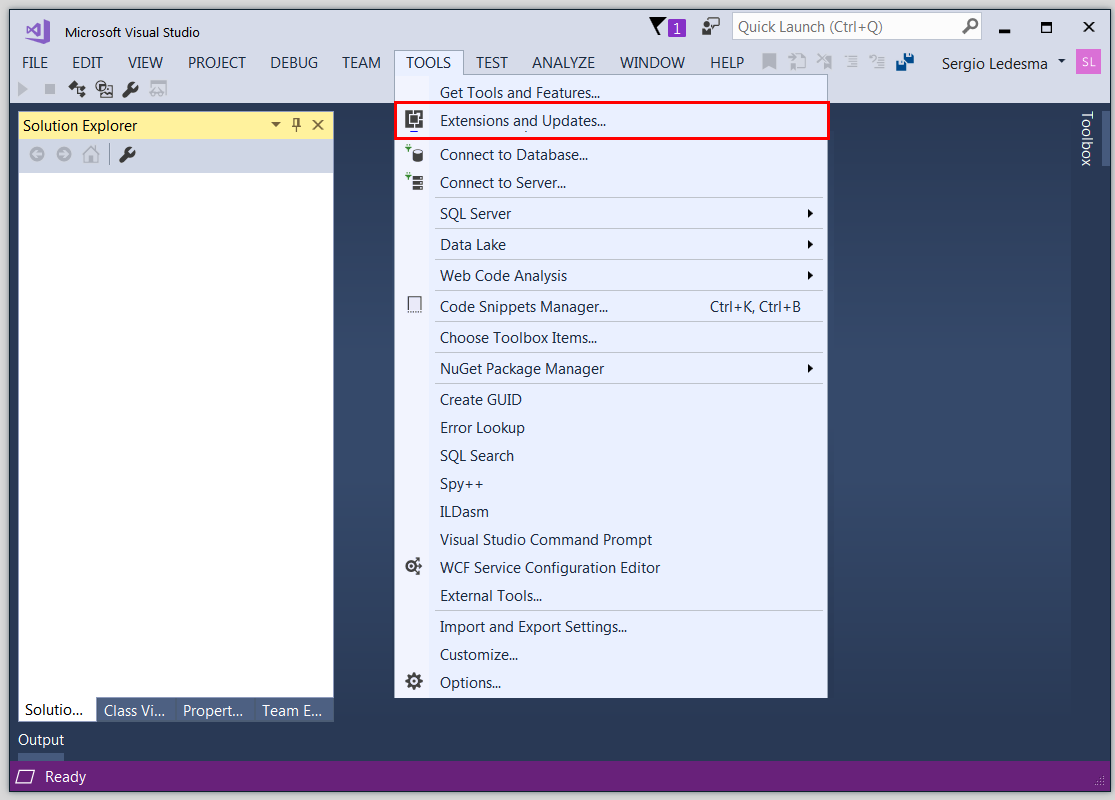
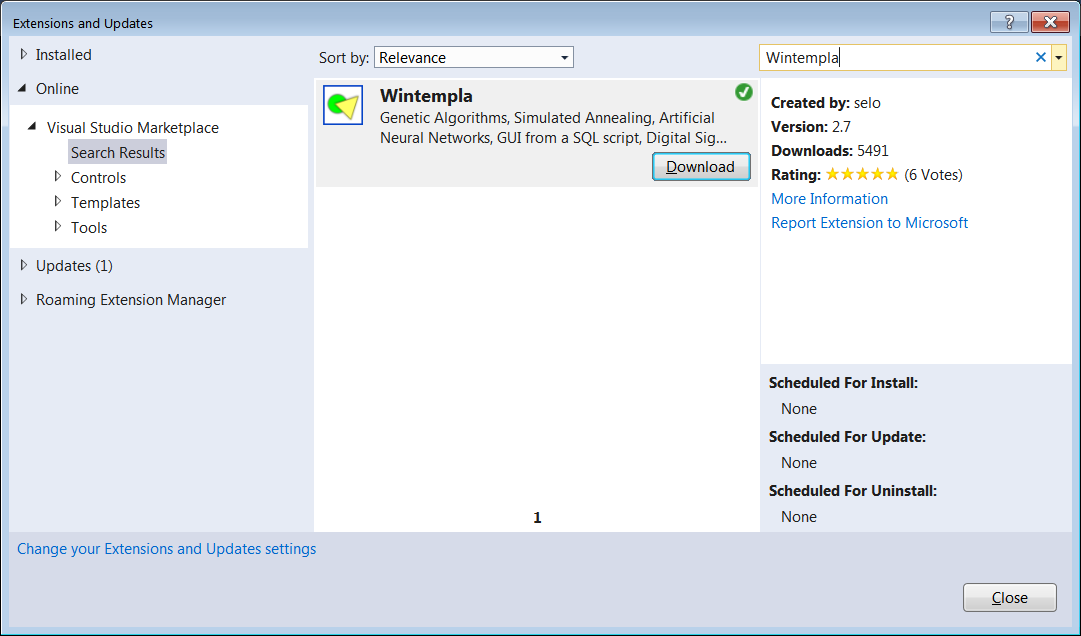
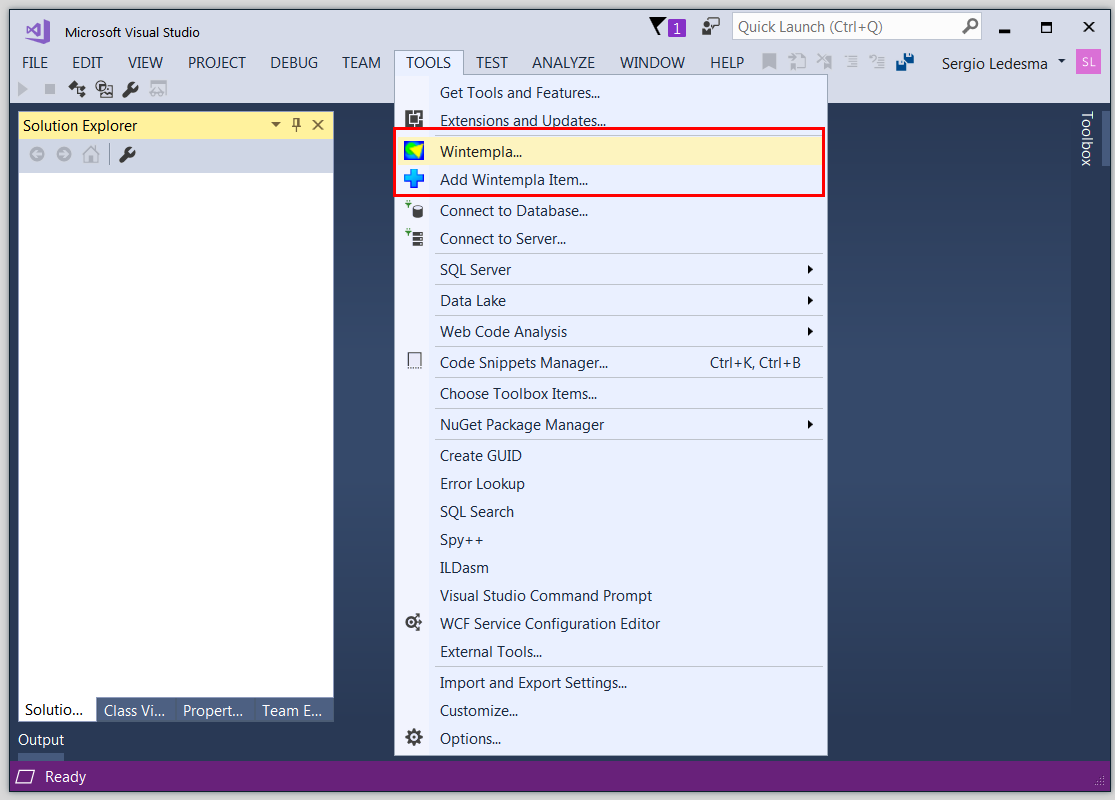
| Install Wintempla. Open Microsoft Visual Studio, and then use the Tools menu to open Extensions and Updates. Search Wintempla in the online extensions, and then install Wintempla. You can also download the Wintempla.vsix file directly from Microsoft Visual Studio Market place https://marketplace.visualstudio.com/items?itemName=SergioELedesma.Wintempla. After completing the installation use the Tools menu to verify that Wintempla was installed. Instale Wintempla. Abra Microsoft Visual Studio, y entonces use el menú de Herramientas para abrir las Extensiones y Actualizaciones. Busque Wintempla en las extensiones en línea, y entonces instale Wintempla. Usted puede también descargar directamente el archivo Wintempla.vsix directamente de Microsoft Visual Studio Market place https://marketplace.visualstudio.com/items?itemName=SergioELedesma.Wintempla. Después de completar la instalación use el menú de Herramientas para verificar que Wintempla fue instalado. |
| Problem 3 |
Create a shortcut to the Tutorial.
Cree un acceso rápido al tutorial.
|
| Tip |
| Microsoft Visual Studio is organized in views. Each view allows managing a part of a program. Most common views can be opened using the View menu. You can click in most views to perform the most common task in the view. You can also use the right click mouse to open the context menu of the views. Microsoft Visual Studio está organizado en vistas. Cada vista permite administrar una parte de un programa. Las vistas más comunes se pueden usar usando el menú de View. Usted puede hacer clic en la mayoría de las vistas para realizar la tarea más común de la vista. Usted también puede usar el botón del ratón derecho para abrir el menú de contexto de las vistas. |
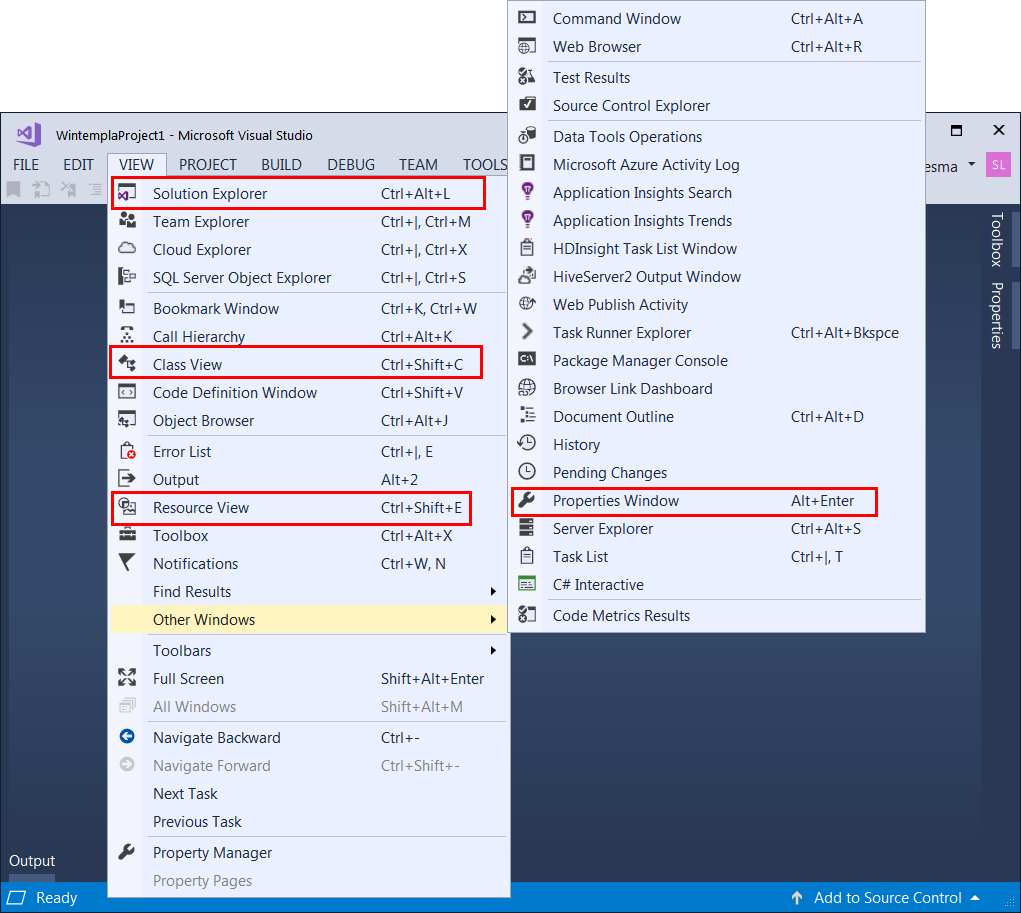
Solution Explorer |
| The Solution Explorer view shows a view of the files associated with a project. It is possible to edit, delete, add files using this view. Use the context menu to manage the files of your project. The figure below shows the Solution Explorer view. La vista de Solution Explorer o Vista de Archivos muestra una vista de los archivos asociados con un proyecto. Es posible, editar, borrar o agregar archivos usando esta vista. Use el menú de contexto para administrar los archivos de su proyecto. La figura de abajo muestra la vista de Solution Explorer. |
Class View |
| The Class View shows a logic view of the program organizing the information in variables, functions, and objects. By far, this is most useful view because it allows the navigation to any part of the program by just making a click. The figure below shows the Class view. La Vista de Clases presenta una vista lógica de un programa organizando la información en variables, funciones y objetos. Por mucho, esta es la vista más útil porque permite la navegación a cualquier parte de un programa con solo hacer clic con el ratón. La figura de abajo muestra la Vista de Clases. |
Resource View |
| The Resource Views is used to manage: menus, images, icons, etc., that are included inside the program. The figure below shows the Resource View. Use the context menu to manage the program resources. The program resources are very useful because avoid using external files when installing the program in another computer. La Vista de Recursos es usada para administrar: menús, imágenes, iconos, etc., que están incluidos dentro de un programa. La figura de abajo muestra la vista de Recursos. Use el menú de contexto para administrar los recursos de un programa. Los recursos de un programa son muy útiles porque evitan usar archivos externos cuando se instala el programa en otra computadora. |
Properties Window |
| The Properties View is useful to manage the properties of: dialogs, forms, object, resources, etc. For instance, a textbox can have the multi-line property so that the textbox displays several text lines in it. A textbox can have the property of read only to prevent the user from modifying the text in the textbox. La Vista de Propiedades es útil para administrar las propiedades de: diálogos, formas, objetos, recursos, etc. Por ejemplo, una caja de texto puede tener la propiedad de multi-línea para que la caja muestre varias líneas de texto en ella. Una caja de texto puede tener la propiedad de solo lectura para prevenir que el usuario modifique el texto en la caja. |
| Tip |
| To storage a Microsoft Visual Studio project into a USB memory of other storage device, it is recommended to delete some files (and folders) from your project to reduce its size. Delete Folder: Debug Delete Folder: Release Delete Folder: ipch Delete File: Program.sdf Delete File: Program.suo Delete File: Program.db Delete Folder: Program\Debug Delete Folder: Program\Release Para almacenar un proyecto de Microsoft Visual Studio en una memoria USB o algún otro dispositivo de almacenamiento, se recomienda borrar algunos archivos (y carpetas) para reducir su tamaño. Borra la carpeta: Debug Borra la carpeta: Release Borra la carpeta: ipch Borra la archivo: Programa.sdf Borra la archivo: Programa.suo Borra la archivo: Programa.db Borra la carpeta: Programa\Debug Borra la carpeta: Programa\Release |